Last night I woke my two oldest children up at 2:30AM. I led my confused and sleepy babies out onto the golf course behind our house armed with a flashlight and a blanket. I spread out the blanket on the cool, damp grass of the fairway, we all laid on it facing northeast … and hoped that the sprinklers would not go off! Lol!
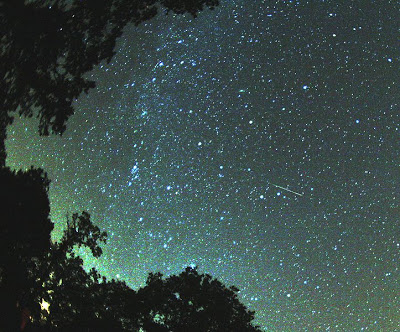
The children were astonished by what they saw - shooting stars, lots of them! We also saw the Milky Way and several satellites marching in line across the night sky.
Our fabulous unplugged (and free!) show was the annual Perseid Meteor Shower. The peak was the nights of August 12 and 13th, but you might still be able to see a pretty good display through the 22nd (especially if you are lucky enough to live in a low ambient light area like we do). Just look to the northeast after midnight.
PS. Most visible in the Northern Hemisphere, sorry!
Are you without any ideas for organized unplugged things to to do on a nice Spring day but you aren’t feeling ambitious enough for a full blown Children’s Garden? Do you have an old fish tank, or large glass bowl? See if your kids want to make a terrarium!
Very few children can resist the idea of their own tiny little garden. Even I remember making one and being totally fascinated by the magic of such a small scale. To me it was like a little doll house garden. If you have a fairy-lover, call it a Fairy Garden. A dragon-lover, why not make a Baby Dragon Garden! Be creative.
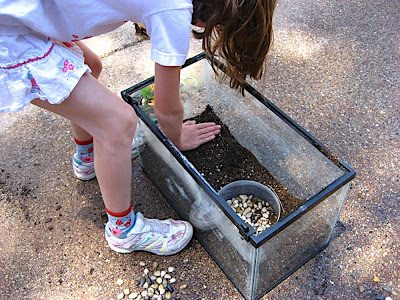
Last Sunday when we had our first gorgeous spring day, I finally told my 9 year-old that she could have the old fish tank in our garage that had been gathering dust in our garage for at least 6 months. She has had her eye on it for some time - but for me, snow and cold are not conducive to warm, green creativity.
We finally pulled it out and I told her she was on her own.
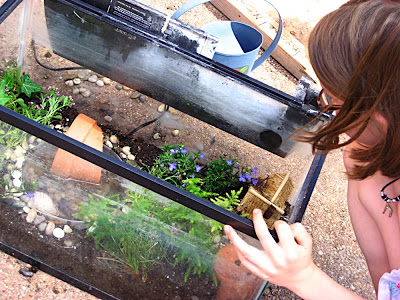
This is what she came up with all by herself (as long as you don’t count my driving her to the nursery to get her plants while I bought mine).
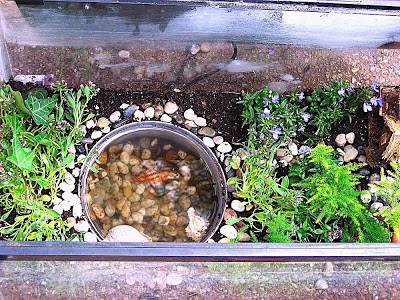
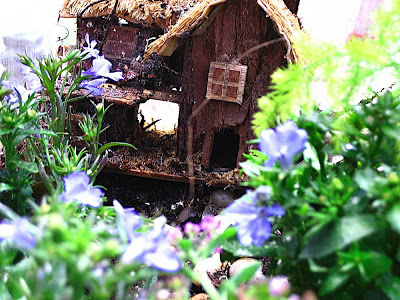
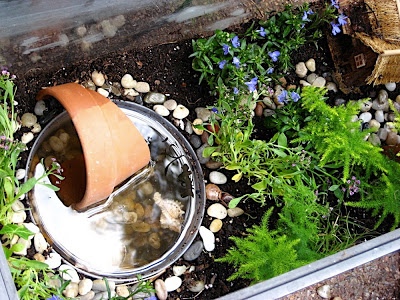
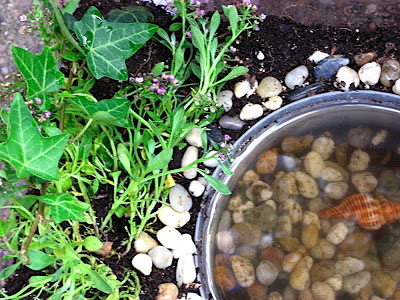
I LOVE the reuse of the little fairy house from our fairy garden of 2 years ago and the path of rocks that lead to it. There is even a pond made out of a food storage container that my daughter wants to put tadpoles in. She put some sea shells in the pond and broken terracotta pots as homes for the future frog residents. Some of the ferns look like trees and there is a small sprig of English Ivy for which she plans to make her own twig trellis.
Very fun and easy!
- Teaches kids not only to be creative about their landscaping ideas, but responsibility in caring for their creation.
- If you don’t have a suitable glass container, try searching yard sales and thrift stores.
The theme for this week’s Unplugged Project was wheel. I searched around for ideas and came up with this one which sounded really interesting: a zoetrope!
What is a zoetrope you ask? (I didn’t know what it was either.) A zoetrope works on the same principle as a flipbook, one of those little books where you flip the pages and it looks like an image is moving, but it uses a rotating cylinder to produce the illusion of movement.
I like this definition from Wikipedia: “A zoetrope is a device that produces an illusion of action from a rapid succession of static pictures.” The word zoetrope comes from the Greek zoe (life) and trope (turn), so it is really a “wheel of life,” perfect for our theme!
Then I found a totally ingenious person who made one out of a salad spinner! Why didn’t I think of that? We absolutely had to try it and the result was AWESOME! It is an easy project that produces a maximum “wow factor.” Try it, here’s how:
Use electrical tape to tape off the slits on the salad spinner basket leaving every third slit open. We used 3/4″ electrical tape and that just happened to be exactly the right size for the job.
For images, the salad spinner genius used cutouts of the phases of the moon from a calendar. Very clever but I decided to draw my own pictures.
On a piece of white paper I marked off a series of 3/4″ x 3/4″ squares.
Then, using a black Sharpie, I drew a face with a changing mouth and waving hair, making each image slightly different than the previous one.
The tedious part was cutting out all 26 images and taping them in sequence to the blocked off areas of the inside of the salad spinner.
Finally, using a clump of rolled up tape, stick your zoetrope onto the overturned lid of the salad spinner, centering it as best you can. The zoetrope will be sitting on the rotating disk, and the salad spinner handle will be underneath.
Now for the fun: spin and look through the slots to see the “movie!” The view is best if you shine a bright light into the bowl of the zoetrope.
Hopefully you’ll see from this little 10 second video that we made, how cool this project really was!
Let’s not forget THE SCIENCE:
So how do flipbooks, zoetropes, thaumatropes (a rotating card with a different picture on each side, the pictures appear to combine when card is spun), cartoons, and old time film movies actually work? Many people still believe in the “persistence of vision” theory, in which it is thought that an image remains in the eye for a certain time after the image source is actually gone (ie. the optic nerve is the cause). Apparently that theory is no longer in favor these days. A more popular theory at the moment involves something called Beta movement where the brain itself apparently combines rapidly flashing images thus forming a perception of movement (ie. the brain is the cause). It seems that no one really understands any of this completely, but here are a few informative links if you are interested:
The theme for this week’s Unplugged Project was weather and the weather today was windy, VERY windy. We decided to try making a homemade anemometer (device that measures wind speed) with the instructions that I found here.
You’ll need some stiff, corrugated cardboard, four small Dixie-type paper cups, a long sharp pencil with eraser, a stapler, scissors, a push pin and some modeling clay.
First cut the small rims off the paper cups using the scissors.
Next cut the cardboard into two strips of equal length. Staple them together in the form of a cross.
Color one cup a different color. Red or something bright would be easier to spot, but all we could find that would work on the waxy surface of the cup was a black Sharpie.
Find the exact center of your cross by drawing an “X” between the corners of the center portion like this:
Where the lines cross is the center and is where you will put your thumb tack. (NOTE: This step is easiest to do before you attach the cups).
Staple a cup to the end of each cardboard strip. Make sure they are all facing the same way and are aligned perpendicular to the cardboard strips.
Push the pin through the center of the cross and into the eraser of the pencil.
Take your anemometer outside and stick it to a porch railing or table in a base made out of modeling clay.
Your anemometer should now spin in the wind! (*SHOULD* - read note below!)
To check the speed, count the number of times the colored cup passes by you in one minute. Obviously the more times it swings by, the faster the wind. You can measure at different times of day to compare the wind speeds.
If you want to get really scientific you can calibrate your anemometer using your car. Read the clever instructions for how to do it here.
* NOTE* - We discovered that although it was a very, very windy day out (55 mph gusts), the gusts were so variable in strength and direction that our anemometer didn’t spin very well (but it did blow off the railing once or twice!).
It worked much better inside with human-generated wind as you can see here in this very primitive video! (PS. Please ignore my messy house):
++++++++++
If you joined in this week’s weatherUnplugged Project, please link to your project post (not just your blog - we always want to be able to find your post) in the Linky below. If you didn’t join in the Unplugged Project but think you might like to in the future, read more about how to participate here. We’d love to have you!
We all had a lovely time flipping rocks this morning for the 3rd Annual International Rock Flipping Day! Honestly, I could not have imagined that rock flipping could be so interesting, but my children, my husband and I all had the best time wandering around flipping rocks (and putting them carefully back of course).
The children ran through our yard and the woods by our house searching for perfect rocks:
We learned that our rocks here are quite beautiful, very volcanic and full of holes:
This one actually showed a distinct lava flow pattern on it:
Under our rocks we discovered:
Mold:
A small mushroom that grew up in the shade of two tightly stacked rocks:
A baby centipede - a teeny tiny yellow thread with lots of legs. I apologize for the bad picture, but much of what we found was very small and hard to photograph:
Strange white beetles with legs and antennae, barely the size of a grain of rice:
The much expected “Rollie Pollies” or Pill Bugs, but these guys were whiter than we had ever seen before:
Ants, LOTS of ants and eggs. Much to our surprise we found that ants don’t just live underground, but actually use the holes in our volcanic rocks as homes and nurseries!
You can even see little dots inside the ant eggs in this photo, Each collection of eggs seemed to have a “nurse ant” to go with it:
A peanut that had been buried (and probably forgotten) by a squirrel - round thing in the middle of the photo:
A small cricket:
Mystery eggs? Not ant eggs and about the size of small beads. Any ideas?
I am "Mom Unplugged," Montessori teacher and mother of three children ages 13, 11 and 7. I invite you to read more about me and my blog here. Thanks for stopping by!