Category: sensorial

Smooth - Goop!!! (Weekly Unplugged Project)

By , October 13, 2008 2:30 am

This week’s Unplugged Project theme was smooth, and I confess that the choice was premeditated. We are away this weekend for fall break, so I knew a project would be hard to fit in. Instead I chose to write about one that we did in August when we were doing a babysitting coop with some friends.

This particular day about 10 kids were at the house. A friend who was moving brought over some liquid laundry starch that she couldn’t pack (the movers wouldn’t take it).

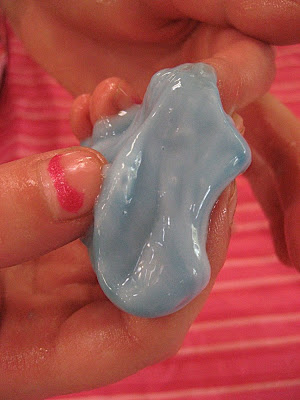
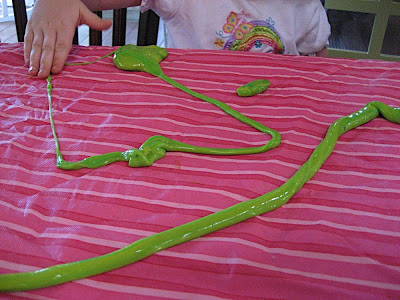
At her suggestion, we combined it with some white glue and made this wonderful, smooth, shiny, slimy, icky, bizarre goop!

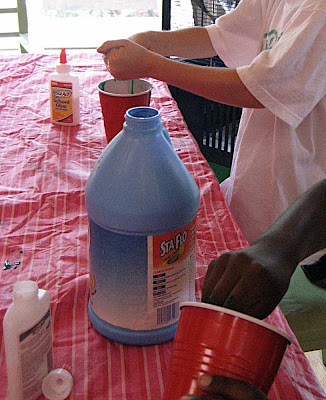
All you need is liquid starch and white (Elmer’s type) glue. Mix glue and starch in a cup or bowl (disposable is best…sorry environment!) in about a 2-1 proportion (in other words: 1/2 cup glue to 1/4 cup starch, vary amounts proportionally as necessary to get the amount you need). Don’t worry too much about accuracy, I just eyeballed it and it was fine. You can add food coloring as we did, or keep it “natural:”

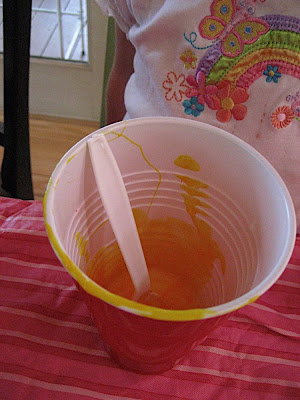
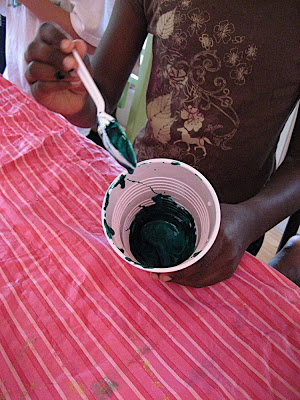
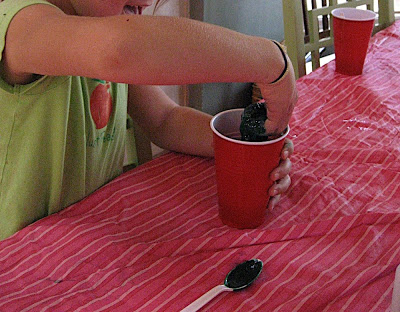
We started mixing in a civilized manner with spoons:

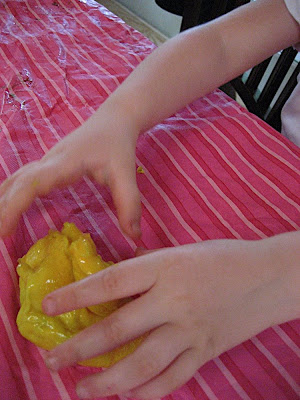
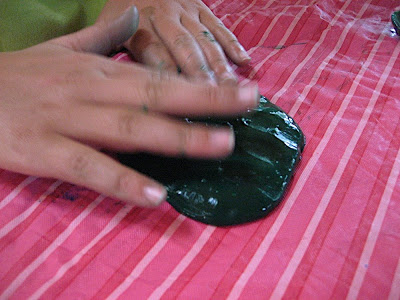
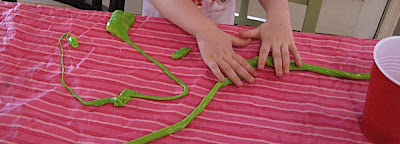
But the children quickly abandoned the spoons for the pleasure of feeling this stuff with their hands:

I wish you could see the expressions on the children’s faces as they mixed and ultimately experimented with the finished goop! Even I found the strange texture fascinating!

They all had a blast, and are still talking about it.

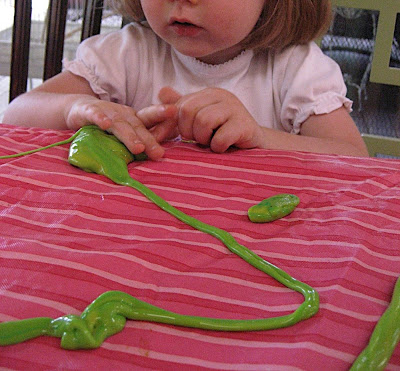
My 2 year-old especially loved this. She sat at the table all alone with her goop for about a half an hour after the other kids had run off to play on the swing set. The sensorial experience for her was totally absorbing:

TIPS:

  • The goop is pretty sticky (yet smooth!) in an almost dough-like way once it is mixed. We found that running the finished ball of goop under the tap helped alleviate some of the initial stickyness. It will be very wet and runny at first, but once it dries out you’ll have a nice workable ball.
  • Try to keep goop away from carpets, clothes etc. Although it doesn’t really stick to skin, tables, counters, etc., it sticks if left to rest on any fabric surface. It does wash out of clothes well though, as I found out with my 2 year-old’s shirt (after all, it is only washable glue and laundry starch), but carpets would be more of a problem.
  • We kept ours in baggies and containers for a few days until I started finding it left out around the house. Then I got sick of it and the baggies began gradually “disappearing.”

EDITED TO ADD: Thanks so much to science teacher Stephanie who left a comment on this post with her alternate recipe that avoids the stickiness:

…make a solution of 50% water and 50% glue in one container and in another take one cup of water and 1 tablespoon of Borax (found in the laundry aisle). Then mix in equal parts of each solution (1/2 cup borax + 1/2 cup glue/water). If you make it in a plastic baggie the stickiness at the beginning in contained. Too sticky add a little more borax.

Thanks Stephanie! Next time we’ll try your version!

AND YET ANOTHER ADDITION: Marta left a comment with some useful information about a fun trick with this, and a cleanup tip:

Just a clean-up note, in regards to Stephanie’s post. Our daycare kids call this mixture flubber. They like to lay it flat on the table and put a straw under one edge. Inflate! Makes great big bubbles. Vinegar seems to work well to get this mess out of clothes, hair, carpets etc…

Thanks very much for the tips Marta. Very useful information!

++++++

If you joined us for this week’s smooth Unplugged Project, then please post a link to your project in Mr. Linky. If you did not do a smooth project, then please do not link, but feel free to browse everyone else’s projects. To find out more about how to participate, please read more here. We’d love to have you!

++++++

I feel like I should make a list of all the themes we have done so far since I am beginning to forget. The wonderful thing about the Unplugged Project is that one theme can generate so many different ideas, so I guess it doesn’t really matter if we repeat.

Next week’s Unplugged Project theme (and I don’t think that we have done it yet) is:

Wax

Have fun with it, and remember any connection to the theme, no matter how slim (the slimmer the better in my mind), “counts!”

++++++

Hard - Permanent Sand Sculptures (Weekly Unplugged Project)

By , September 21, 2008 8:57 pm

Last week for our sand Unplugged Project, I had an idea for making permanent sand castles which I had seen as a proofreading exercise in my daughter’s spelling workbook! (Spelling Workout, Level D, Modern Curriculum Press, p. 12)

Hey, you never know where you might find inspiration, right? My kids vetoed me last week for this particular sand project, and chose to do something else instead, but I figured we’d get to try it for this week’s theme of hard. Plus, since it was recently my sister’s birthday and she loves Hawaii, we made sand sculptures for her.

We followed the instructions in the spelling book. We needed sand, cornstarch, and water. The recipe called for 2 cups sand, and 1 cup each of cornstarch and water. We doubled it.

Sand was easy. We went out to our big sand pile and scooped up 4 cups of sand and put it in a big cooking pot. We then poured in 2 cups of cornstarch:

And 2 cups of water:

And stirred over low heat.

We stirred for a while. It was very runny, but looked yummy, like melted chocolate ice cream.

After about 10 minutes we got bored and left it alone for another 5 minutes or so. When we rechecked it, it had transformed into a solid, stiff lump! I had to trade in my plastic spoon for a sturdy metal one or it would have snapped in two! It was so stiff that in this photo, the spoon is standing up on its own:

I had prepared the kitchen table with our craft tablecloth as well as a plastic garbage bag for easier clean-up. We dumped the mixture out on the garbage bag to cool.

It cooled quickly and soon we were all playing with the warm, squishy, sand playdough. It felt really nice.

Eventually, it started to dry and get a bit crumbly so I put out a bowl of water to sprinkle on it. A spray bottle of water turned out to be even better, and more entertaining.

We shaped it and poked it with sharp pencils, toothpicks, even a funnel.

Afterwards we put our creations on plates to dry. Here are the results:

The next day, we unfortunately discovered that my 2 year-old’s hand print and the starfish were breaking apart. The two sand castles however, were fine. I would recommend this project only for larger, 3-D sculptures, but the thinner, flat ones were disappointing. But…in case you were wondering, the pot cleaned up fine!

PS: In reviewing last week’s projects, I saw that Meg had made something similar as part of her sand project, but used sand and glue instead of cornstarch. She used molds to make starfish and they turned out really well! Consider experimenting with molds for extra fun if you try this. Karen B. also made “sand clay” similar to our recipe and added salt to hers to slow spoiling.

++++++++

Did you join in this week’s Unplugged Project themed hard? If so, then please add a link to your project in Mr. Linky below. If you didn’t join us this week, then feel free to browse the links below and read about how to join in for next week!

++++++++

Next week’s Unplugged Project theme will be:

Fruit

Enjoy!

Sand - Creative Mixing and Sand Pictures (Weekly Unplugged Project)

By , September 15, 2008 6:58 am

This week’s Unplugged Project theme of sand was inspired by the giant pile of sand that we have near our swing set. We had it brought it in to spread around the swing set area to soften the crash zone and also to control weeds.

I thought my children would have a lovely time spreading the sand nicely throughout the area. Wrong. My children have a lovely time playing on the pile of sand and don’t want it spread out! Oh well, for now we will leave it as is. It is providing hours of cheap entertainment.

I had all kinds of cool sand ideas, but my kids had their own idea so I just let them go with it: mixing. One of their favorite activities is standing at the kitchen sink while I cook and taking bits of the ingredients (flour, vinegar, spices, salt, whatever is out) and mixing it all in a bowl accompanied by plenty of “oohs”, “aahs”, and shouts of “gross!”

First we scooped some sand into containers and brought it in.

I wisely laid out my vinyl “craft” tablecloth that we use for messy projects. The children then gathered some dry ingredients: sugar, salt, flour, parsley flakes (that I never use and for some reason I have an ancient, industrial sized container of them), cumin (for the lovely smell), and celery salt (because again, I have too much of it!).

In the back of the pantry we also found some red lentils for color. The children wanted to grind them up with a mortar and pestle, but it turns out that lentils are VERY hard so they used them whole.

I passed out an assortment of spoons, small ladles, a honey stirrer, and a tuna can strainer for sifting. Of course hands were the most fun to use.

The kids sat quietly and mixed and played with it for at least an hour, maybe more. They had a ball, I relaxed, and the kitchen took on a lovely cumin scent!

Next my oldest daughter had the idea of making sand pictures with glue. The kids put Elmer’s glue on construction paper to make a design:

Then they sprinkled their sand mixture on the paper making sure to cover all the glue:

Next was the fun part - dumping the sand off the paper to see how the picture turned out (lots of oohs and aahs)!

The kids also experimented with tissue paper, lentils and sugar.

The finished art (Blue: 8 year-old, White: 6 year-old, and Yellow: 2 year-old):

TIPS:

1) This is a good outdoor project, or indoors with a tablecloth - but be prepared to vacuum after.

2) Since food ingredients are involved, make sure little ones don’t try to eat their creations.

4) If you do use spices: MONITOR HOW MUCH IS USED (or this project could get pricey). Also - avoid anything containing pepper unless you have a lot of Kleenex on hand.

5) If you allow the use of water, be sure it is only a small amount or be prepared for a big muddy mess!

6) If kids dump their sand outside when done, be sure you know where they do this. Ours went into one of my rose beds so I should have a nice crop of lentils sprouting very soon. :(

+++++++++

Finally, here are some photos of the very favorite sand Unplugged Project around here, jumping off the swings and landing on the sand pile!

+++++++++

Did you join us for a sand project this week? If you took part in the Unplugged Project this week, please link to your post. If you didn’t do a sand project, then please do not link, but read about how to join in next week!

+++++++++

Since we recently did soft, the theme for next week’s Unplugged Project will be:

Hard

Have fun!

Blog Widget by LinkWithin

Panorama Theme by Themocracy