Category: arts and crafts

Invisible Ink Messages (“Messages” Unplugged Project)

By , January 23, 2011 4:00 pm

All spies love invisible ink. In honor of this month’s Unplugged Project theme of messages here are two simple methods for making secret, invisible ink messages out of ordinary ingredients.

++++++++++

LEMON JUICE:

Either squeeze a lemon or be lazy like me and use that store bought lemon juice that comes in the little plastic lemon! Put the juice in a small dish and use a cotton swab to write your secret message.

++++++++++

BAKING SODA & WATER:

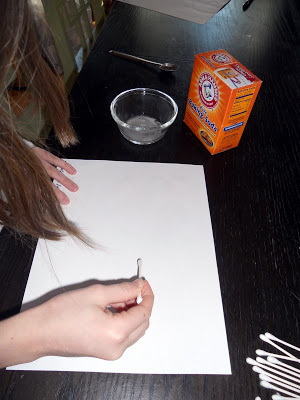
Mix together equal parts baking soda and water in a small bowl. Again, use a cotton swab to create your message.

++++++++++

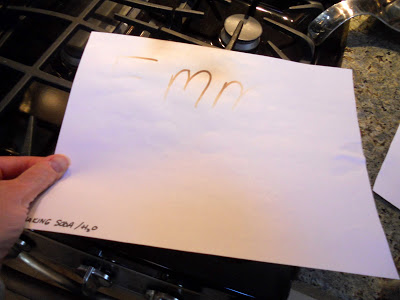
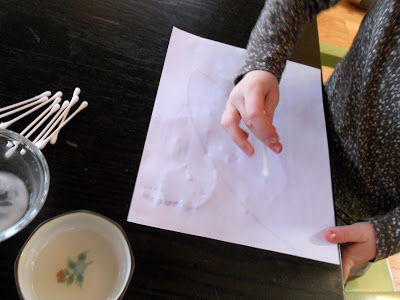
Once the messages are completely dry and can no longer be seen on the paper, hold the paper over a heat source and the message will magically be revealed to guaranteed “oohs and aahs!” (Obviously an adult should complete this step, especially with young children, so as to avoid burns and flaming paper.)

By the way, we found that the baking soda produced a slightly darker result than the lemon juice.

NOTE:

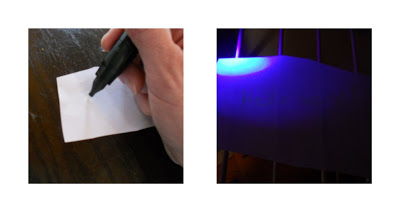
For those whose children channel James Bond rather than Martha Stewart, a high-tech invisible ink spy pen complete with built-in ultraviolet decoding light might be just the ticket. My son found this one in his Christmas stocking:

LINKS - More about invisible ink:
The Naked Scientist - Secret Messages-What Makes an Invisible Ink?
Kidzworld-How Invisible Ink Works
Science Project Ideas - Invisible Ink (this site has some other interesting methods too)

Giving Thanks - Monthly Unplugged Project

By , November 20, 2010 12:42 pm

I have been so busy sorting and de-junking my house, that I have had little time to blog and my Monthly Unplugged Project has fallen a bit by the wayside.

Even though we are already halfway through November, here is a theme that we can perhaps do before the end of November since, in the United States, the Thanksgiving Holiday is coming up next week and many of us are already thinking about how to give thanks.

How do you give thanks? Do you have projects, artwork, crafts that fit the theme of giving thanks?

Join in and have fun! If you have never joined us before, please consider it. You can read more about how it works here.

I’ll start it off with a link to a “thankful” project that we invented and enjoyed.

(Please only link to “giving thanks”-related projects. I will have to remove unrelated links, no matter how nice your website.)

Ghosty, Ghoulies …

By , October 14, 2010 9:21 am

Here are a couple of quick and fun Halloween ideas that I love, but unfortunately can’t really take credit for. The first came from school, the second was from a bake sale. Oh well, have fun with them anyway!

Ghostly Foot Prints:

Boney Witch Hands:

(These are just plastic food service gloves with candy corn “fingernails” in the tips and then filled with popcorn “bones.” Tie wrists closed with black yarn or ribbon!)

Clam Shell Mobile - “Beach” Unplugged Project

By , August 2, 2010 2:01 pm

TURN YOUR DINNER INTO ART!

As is my pattern these days, I am a day or two late in posting our project for July’s Unplugged Project theme of beach. Oh well!

I am such a packrat that I have had these clam shells sitting around all summer. In fact, I am embarrassed to admit that I saved them from a fabulous meal in Upstate New York back in June and brought them all the way home with me! (I just don’t really trust Arizona seafood.) We soaked them in hot soapy water right away after eating to clean off any grease and smell.

We used a dremel tool to drill a small hole in each one. You’ll need a good masonry drill or dremel bit for this since, as we discovered, clam shells are quite hard.

Before we began painting, we soaked them again, this time overnight in pure bleach just to get rid of the last lingering slightly clammy smell. We then rinsed them off in cold water and let them dry.

Next we painted the outside of them bright colors. (I think it would also have been a pretty project with them left as-is, but my daughter wanted them to be colorful since this was to hang in her room.)

After the paint dried, we decided to splatter them with gold paint using old toothbrushes. Fun but a bit messy!

We left the inside natural, but you could paint that too if you want.

After they had dried completely (overnight), we strung a piece of fishing line through each one. My daughter brought in four sticks from the yard to make the frames for hanging them.

We tied each pair of sticks together in the form of a cross using yarn and then hung one shell off each arm of one of the crosses. We suspended the second cross below the first using yarn to create a second tier. We again tied one shell onto each arm and hung our final one much lower from the center.

Voilà!

Miniature Food

By , June 21, 2010 1:30 pm

We are very late for last month’s Unplugged Project theme of bread, but since it is my blog, I am just going to slip it in anyhow!

Inspired by my recent emotional reunion with my beloved childhood dollhouse after about 30 years, I thought the kids and I could make some miniature food out of a glue-bread mixture that is commonly used by miniature designers (and me, many years ago).

First take a slice of white bread and tear it up into smallish pieces. My 4 year-old was a great help with this step.

Pour some white glue on to your bread crumbs and mix it together with your hands (VERY MESSY PROCESS!). Don’t overdo the glue at first, you can always add more if you need to but it’ll probably end up being nearly as much glue as bread crumbs.

Squeeze it and knead it until you have a smooth ball of “dough.” You’ll know you have the right consistency when it is smooth, looses its stickiness, and feels like real bread dough.

Next, decide what you are going to make and whether you want to pre-color your dough. If so, you can divide it up and mix in some food coloring or paint to achieve the desired color. We mixed in paint. Here we are making green dough for lettuce:

Adding red paint to make cherries for a pie:

Mold your food. A bottle cap makes a nice little pie dish or plate. A toothpick is an excellent tool for both shaping and painting.

Leave it out to dry and harden, about 24 hours. Once hard, you can spray it with a clear acrylic to protect it and create a shiny finish.

Here is some of the food we made:

~Some of my favorites~

Spaghetti and meatballs (in a bottle cap):

Chocolate chip cookies:

Cake and bread:

Hot dogs (with ketchup and mustard):

Now the dollhouse residents won’t be hungry anymore!

PS. This month’s Unplugged Project theme is sleep. Why don’t you join us? Read more about how it works here.

Blog Widget by LinkWithin

Panorama Theme by Themocracy