Posts tagged: fabric

Clothing - Dollhouse Rag Rug (Weekly Unplugged Project)

By , February 22, 2009 8:25 pm

The theme for this week’s Unplugged Project was clothing. We had a few ideas, but ultimately decided to experiment with weaving strips of fabric made from an old shirt.

First: the nasty shirt.

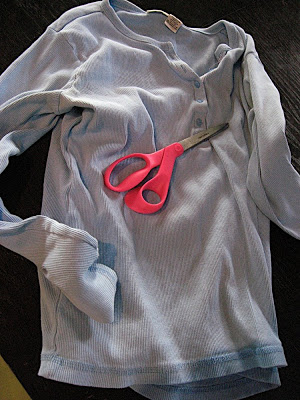
This is a shirt that had been a comfortable favorite of mine for quite some time. Too much time. It was stretched and shapeless and discolored. Très chic, don’t you think? I knew it was time for the shirt and I to part company. But since I didn’t even think it was in decent enough shape to donate, it was clearly a perfect candidate for shredding.

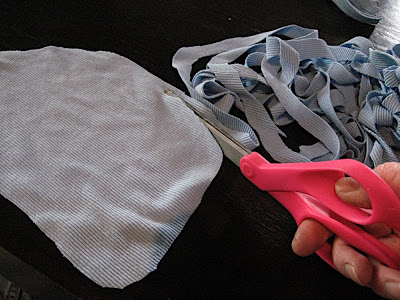
I cut the sleeves off, and then cut the shirt in half along the seams. I cut the side and bottom seams off, as well as the neck. I was left with two flat pieces of fabric.

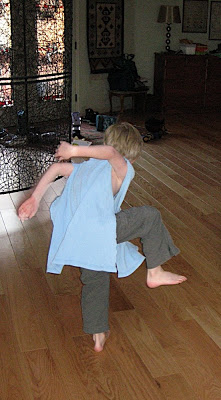
The kids thought I had gone mad at first when they saw me cutting up my shirt, but then they got into the spirit of the moment and I had a hard time getting my cut up shirt back to finish the job!

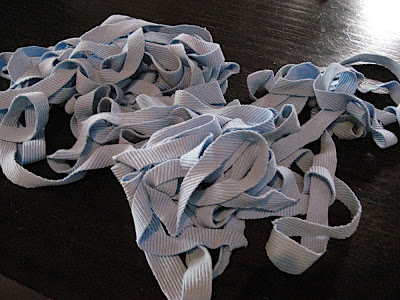
We cut each section of the shirt into an oval shape and then began cutting it into a single spiral strip about 1/2 inch wide (approx 1.25 cm).

This was the result:

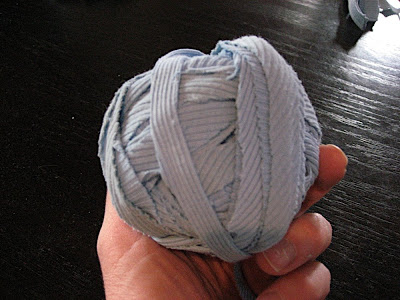
We wound the two lots of cloth into balls:

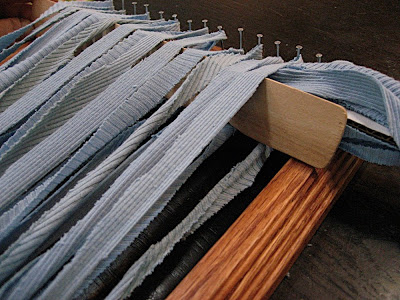
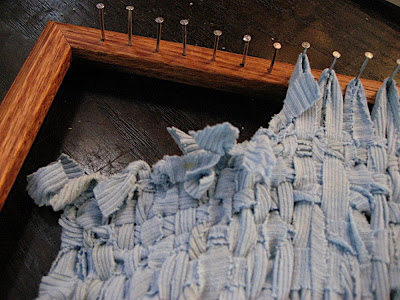
Next we got out our $2.00 picture frame loom. I warped it with the fabric by winding a single strip up and down around the nails. I have seen this done, but … hmmm… I didn’t like it much.

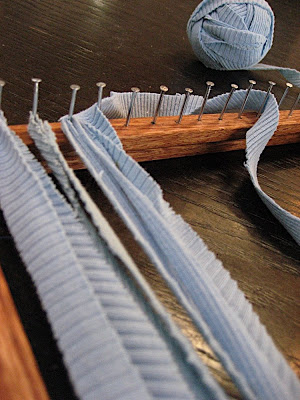
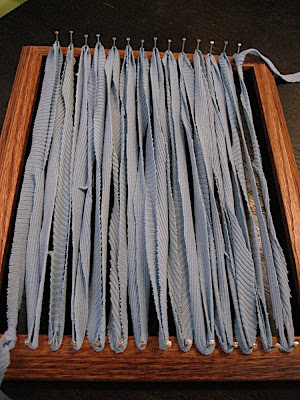
This was an experiment. Next time, I would warp it like our yarn dollhouse rug, by cutting single strips and tying one on each set of nails. We got a bit confused because there were two warp strips on each nail. Since this rug was “rustic,” a few mistakes didn’t really matter. In fact one could optimistically say that they actually enhanced the rug. But now I know that I prefer to have one warp string on each nail.

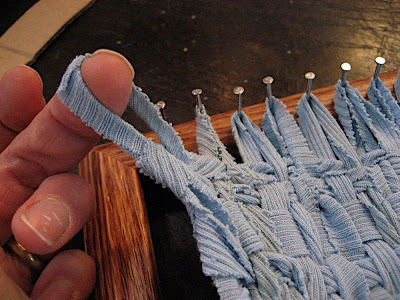
I wrapped the cloth around the shuttle and we began weaving.

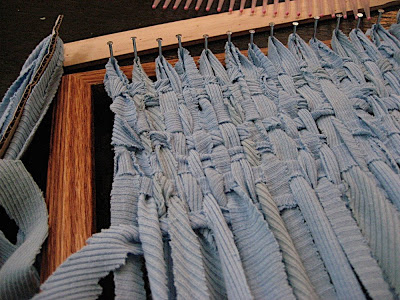
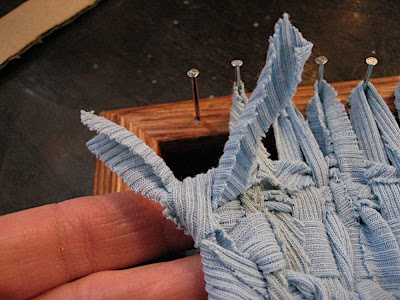
To finish it up, I lifted each loop off the nail, cut it, and tied the two ends together in a sturdy knot.

The final result:

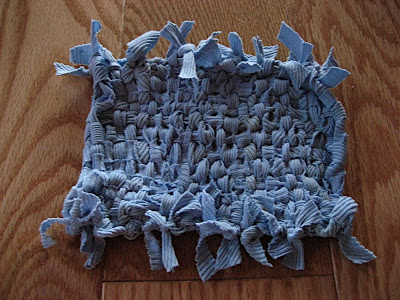
We used it to keep the dolls’ feet toasty in their bathroom, but it could also be a potholder, or even a dish washing cloth (that’s what my husband thought it was).

++++++++++

If you did a clothing Unplugged Project this week, then please link to your project in the Mr. Linky below. If not, then follow the links to everyone’s project and enjoy! If you are interested in learning more about how to join us, then please read about it here. We’d love to have you!

++++++++++

The theme for next week’s Unplugged Project will be:

Bottle

Enjoy!

++++++++++

Wrinkle - Batik Book Covers (Weekly Unplugged Project)

By , February 15, 2009 8:56 pm

The theme for this week’s Unplugged Project is wrinkle. We decided to do a little batik and experiment with wrinkling the wax.

You will need a piece of fabric (a natural fiber works best, we used a piece cut off of an old cotton sheet), wax, and a dye. We almost used beet juice, but finally decided on blue food coloring. As usual, I was ill-prepared and had no wax so we just melted some candle stubs. If you melt candles, be thoughtful about your choice of colors since colored wax will dye the fabric.

First we melted the candles in a tin can set in a pan of boiling water. We had white candles and green so we melted them separately and planned on using the green to help color our fabric.

We laid the cloth out on some wax paper and poured the wax on it. Be careful, the can will be very hot! First the white:

Then the green:

As you can see, we tried to cover most of the fabric since we really wanted to see the effect of wrinkling and cracking the wax. If you would like a different effect, then just cover parts of the fabric with wax, or pour on a design or pattern. The dye will not stick to any waxed portion of the fabric:

We let the wax dry and cool completely. The cloth was now as stiff as cardboard.

We crumpled and scrunched the stiff fabric and created cracks.

We put some blue food coloring in a bowl of cold water (hot would melt, or at least soften, the wax), and then we pushed the wax covered cloth in with a spoon. We left it in for an hour and the exposed areas turned a very pale blue. This step might not have been necessary, but at least it got the fabric wet and ready for more dye.

Next we laid the cloth out on a foil-lined baking sheet and dropped straight food coloring on to the cracks and spread it around.

What I learned - be sure to wear gloves if you are going to be handling food coloring! (This photo was taken AFTER I had washed them several times…)

I might be blue forever.

We let it sit for 10 or 15 minutes to let the color absorb, then we set about removing the wax. First we used knives to scrape off as much of the wax as possible.

I covered my ironing board with an old, folded towel and laid the fabric on a brown paper bag. I covered it with another brown paper bag and ironed with the iron on the highest setting but without steam.

The wax simply melted onto the bags. I replaced the bags a few times until no more wax appeared and it was all out of the fabric. We also tried paper towels, since I heard that they worked too, and they did quite well also.

Here is our finished fabric. The ironing dried it all nicely and we were able to work with it right away. Notice the green color in with the blue? The green is from the green candle wax, and is why we chose blue food coloring because we thought the two colors would look pretty together.

We had two little old notebooks that we covered with the dyed cloth using fabric glue.

We added a matching ribbon bookmark, and there you have it! A fun afternoon!

++++++++++

If you did a wrinkle Unplugged Project this week, then please put a link to your post in the Mr. Linky below. If you link to the post rather than the blog, then we will always be able to find you - forever and ever! If you did not do a wrinkle project, then please do not link, but be sure to follow the links to see the other great wrinkle projects. If you wish to read about how to join in, then read more here. We’d love to have you with us!

++++++++++

The theme for next week’s Unplugged Project will be:

Clothing

I hope you all have fun!

++++++++++

Fabric (Weekly Unplugged Project)

By , February 17, 2008 7:33 pm

This week’s Unplugged Project theme was fabric. I must admit to having had a hard time with this one, so I finally decided to quit worrying about it and leave it up to the kids. I asked them what they thought they could do with fabric and my oldest daughter immediately began talking about a picture of a tiger that would be filled in with scraps of fabric instead of being colored-in with markers. I thought this sounded like a fine idea, but then I made the mistake of mentioning the word “sewing.”

Both faces lit up. The fabric collage was forgotten and out came the sewing machine. They have both used it before and can manage, even my 5 year-old, with some assistance.

I found some pretty fabric pieces in a laundry room cupboard. I also hauled out a big tub of fabric remnants that has moved with me, unopened, from garage to garage for the last 8 years or so. At least I thought it was unopened. Upon removing the lid, this is what we found:

A mouse pantry! At least I guess it was a mouse, although I saw no droppings. Whatever it was had stocked up quite a larder full of sunflower seeds! How embarrassing. When you have rodents living comfortably in your fabric storage container, you really can’t claim to be very “crafty,”can you?

Once we got over the laugh about the mouse nest, we settled down to business with the laundry room fabric (I’ll wash the other, just in case).

My 7 year-old daughter decided to make a small pillow for herself. I remembered that I had some very nice potpourri stashed away in the linen closet and suggested that she put some of that in there too, to make it smell good. Unfortunately even WordPress can’t create a scratch-and-sniff blog post yet, but it really does smell lovely!

This was the process:

After the success of the pillow the kids really went to town and began making little flags by cutting triangles and sewing a small open hem through which they pushed a drinking straw. This was all their own idea. They then thundered around the house holding “races” until dinner time (the flags were the “prizes”):

And here is the baby’s fabric project (simple, but fun for a 2 year-old…and all her idea!):

All in all, we had a surprisingly fun time! (And the kids were amused for HOURS!!!)

So what did you do with fabric? Or did I scare you all away by choosing such a potentially intimidating theme! I hope not. If you did do the project, please leave your name in Mr. Linky (if he decides to work this week). Please also be sure to leave a comment if you participated, that way if Mr. Linky fails and I have to remove him, we’ll still have a link to your project.

By the way, for those of you Unplugged Project “old-timers,” please check out this link, I gave you all a little something (at least any of you who collect blog awards). I think everyone missed it!

++++++++++++++++++++++++++++++++++++++++

Next week’s Unplugged Project will be:

Letters (Alphabet)

Hopefully it will be less intimidating than fabric, and it offers a wide variety of activity options.

Please feel free to join in and remember to have fun!

++++++++++++++++++++++++++++++++++++++++

Blog Widget by LinkWithin

Fight World Hunger

Panorama Theme by Themocracy